Author Archives: GCS Dev

What is “pH?” Why Is It Important?

Devised in 1909, the pH scale measures the concentration of hydrogen ions in a solution. The scale ranges from 0-14. Pure water is “neutral” and has a pH of 7, midway between 0 and 14. If a solution has a low concentration of hydrogen ions, the rating will be a higher number and is considered basic or alkaline. Likewise, a high concentration of hydrogen ions rates a lower number and is considered acidic.

What pH Means to Your Garden

There are four important reasons to monitor your soil’s pH level:

  1. pH affects the availability of other nutrients in the soil. If the nutrients are not available because they are chemically bound to something else, plants can’t use that nutrient.
  2. A high or low pH level in the soil allows some plant diseases to multiply more quickly, infecting an entire landscape or garden.
  3. Most organisms living in the soil have pH preferences. For example, earthworms are not as plentiful in acidic soil.
  4. Most plants have specific pH requirements to flourish. Those specific requirements are what the plants need to absorb nutrients more efficiently and resist pests more effectively.

Where Soil pH Occurs

Acidic soil generally occurs in heavy rainfall areas, as the rain will pull acidic compounds from the air and allow them to leach into the soil. Alkaline soil, then, is more common where there is less rain. However, this is just a generalization and neighbors across the street from each other may have a large pH difference. Reasons could include the origin of topsoil brought in, the tillage done in the area and prior occupants’ gardening habits. Even simple changes like how drain spouts are positioned or a watering schedule can impact pH.

The pH Your Plants Need

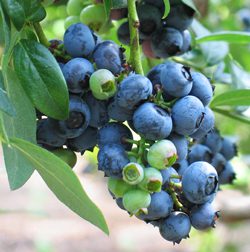
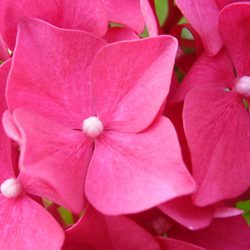
Most plants will grow well in the neutral zone of 6.5-7.0. However, some plants grow best in specific soil pH conditions. Interestingly, hydrangeas grow well in both slightly acidic and slightly alkaline soils, but the flowers will be blue in acidic soil or pink in alkaline soil. The colors and flavors of fruits and vegetables may also vary somewhat depending on the soil’s pH, even if the plant will thrive in a wider range.

This chart illustrates how slight pH changes can dramatically impact which plants will thrive in certain soils…

Highly Acidic Conditions

(pH between 5 and 6)

Slightly Acidic Conditions

(pH between 6 and 6.5)

Slightly Alkaline Conditions

(pH between 7 and 7.5)

Rhododendrons Blueberries Arrowwood Viburnum
Azaleas Magnolias Box Elder
Camellias Ferns Locust
Pieris Firs Philadelphus
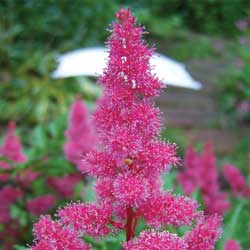
Astilbe Viburnum davidii Hellebores

As you see, pH can influence your gardening choices. Knowing the pH of your soil is the first step towards understanding your soil and improving your garden. By knowing the pH, you may choose the best plants for your site. You may also decide to amend your soil to increase or decrease the pH to grow a wider variety of plants.

We offer several inexpensive and easy-to-use pH test kits. We also offer amendment advice and can help you choose the best plants for your soil’s condition. Stop in for pH help today and we’ll help you make the most of the natural acidity or alkalinity of your soil, or else help you turn that soil into just the pH you desire!
ph_4

ph_1

ph_2

ph_3

Soil 101

How well do you understand your soil? It’s more than just dirt, and the more you learn about soil, the better you’ll be able to care for it to ensure a stunning landscape, healthy lawn and productive garden.

All About Soil

The four elements of soil are minerals, water, air and organic matter. Different combinations of the four elements create the four main categories of soil: sand, silt, clay and loam. Of course, we all want loam – that rich, vibrant soil thriving with beneficial bacteria and with a smooth but crumbly texture ideal for root growth. Unfortunately, true loam soils are rare, especially around homes where topsoil was removed and heavy machines compacted the remaining soil during construction or renovation. Most of us have clay soil, which has finer particles that compact easily into a dense mass. Clay soils also retain more water and can easily become too soggy or waterlogged for healthy plants. But just because your soil may be clay, it doesn’t have to stay that way!

Improving Soil

Improving soil is actually quite easy. All soils are improved by adding minerals and organic material that help balance out the overall components of the soil’s structure.

Before adding minerals, test the soil to determine its pH (acidity or alkalinity) and determine any mineral deficiencies. Lime decreases soil acidity, gypsum adds calcium and helps break up heavy clay and sulfur increases acidity. Other soil amendments to add to a clay soil include sand, cottonseed meal and peat moss, all of which will help improve the drainage and structure.

Organic matter refers to plant or animal materials decomposed into compost or “humus.” This residue comes from leaves and other plant materials, as well as certain animal wastes. Grass clippings, paper and certain types of decomposing food can also be ideal compost. The quality depends on the origin of the original biodegradable matter. Many people make their own compost using bins in which materials are mixed until they decompose. Others purchase finished compost. When compost is added to soil, it releases nutrients that are vital for healthy plants, and healthy bacteria and microbes will thrive in organically-rich soil.

The Magic of Mulch

Mulching is a simple way to add biodegradable materials to the soil. Evergreen needles, tree leaves, lawn clippings, chicken manure, etc., can be worked into the soil to decompose. This process improves the air spaces between the soil particles and rearranges the sand, silt and clay to produce optimum soil structure, improving the water retention and drainage balance and making nutrients available to plants.

When soil has proper structure and sufficient nutrients for healthy plants, optimum health has been achieved, and great soil will lead to great landscaping, turf and gardens. Congratulations and keep on growing!

soil_4

soil_1

soil_2

soil_3

Protecting Our Pollinators

Every garden requires pollinators, and bees are among the finest. Without them there would be limited flowers and far fewer fruits and vegetables. Did you know that about 30 percent of the food we eat depends on the pollination of bees, including onions, cashews, coffee, carrots, chocolate and vanilla? If we don’t protect these prolific pollinators, our landscapes, gardens and diets will be irrevocably changed.

About Bees

Although there are many bees that are great pollinators, like carpenter, mining, sweat and cellophane bees, some of the most well known and easily identified bees are the honeybee and bumblebee. Both of these bees live in social colonies and are cavity nesters. Because these bees are active all summer long, they require a constant supply of floral nectar close to their hive and they thrive in flower gardens, orchards and other areas with abundant blooms.

Unfortunately, both these types of bees – along with many others – are disappearing rapidly, and two key threats are to blame.

  • Habitat Loss: As more natural habitat is lost to development, there are fewer nesting locations and inadequate food supplies for bees. While meadows developed into resorts and parks disappearing for strip malls are obvious examples of development, other less visible developments that can hurt bees include widespread use of flower cultivars that do not produce adequate nectar, eliminating critical bee food sources.
  • Pesticide Drift: Widespread, abundant spraying of pesticides to protect crops, lawns and parks can inadvertently hurt bees. Stronger pesticides can kill bees directly, while less potent toxins can contaminate nectar and will gradually build up to fatal levels in bees’ systems. Even if pesticides are not sprayed in areas where bees are abundant, high level spraying can easily be spread by wind patterns into critical bee habitats.

Inviting Bees to Your Garden

Fortunately, it is easy to bring more bees to your garden and encourage healthy bee populations. To support local bees…

  • Planting a variety of flowers that will bloom throughout the entire summer to provide ongoing food supplies.
  • Opt for native flower varieties that will be more easily recognized and used by bees, instead of introduced flowers that are less familiar.
  • Eliminate chemical use in your yard, as much as possible, including on your lawn, garden and trees, especially while plants are in flower.
  • Provide bees a safe place for shelter and to lay their eggs. A wood pile is suitable, or you can invest in a specialized bee house.
  • Make sure that there is an available water source for your bees. A bird bath or any simple water basin works just fine.

Want to bring bees to your yard and help them feel at home? Start with this list of native plants bees love, and ask our experts for more tips about keeping your lawn and garden bee-friendly!

Native Plants That Attract Bees

  • Apple (Malus)
  • Aster (Aster)
  • Blackberry & Raspberry (Rubis)
  • Black-Eyed Susan (Rudbeckia)
  • Blueberries (Vaccinium)
  • Currant (Ribes)
  • Elder (Sambucus)
  • Goldenrod (Solidago)
  • Highbush Cranberry (Viburnum)
  • Joe-Pye Weed (Eupatorium)
  • Lupine (Lupinus)
  • Penstemon (Penstemon)
  • Purple Coneflower (Echinacea)
  • Redbud (Cercis)
  • Rhododendron (Rhododendron)
  • Sage (Salvia)
  • Stonecrop (Sedum)
  • Sunflower (Helianthus)
  • Willow (Salix)

bee_2bee_3

bee_1

Spring Lawn Renovation

Spring is the ideal time to spruce up your lawn. After a long winter, you can easily see where any bald, bare or thin patches exist, as well as where weeds or fungus may be taking over the lawn. Fortunately, there are easy ways to set your lawn to rights!

Seeding

If you are planning to seed a new lawn or overseed an existing lawn, it is best to seed as early as possible. It is important to get seed germinated and growing before trees begin to leaf out, when the trees will be usurping more of the soil’s moisture and nutrition and new leaves will block sunlight from the grass seed. This is especially true in more heavily shaded areas. Keep the area moist at all times until the roots of grass seed become established, then you can gradually decrease the frequency of watering. The new grass can be mowed when it reaches a height of about three inches.

Rejuvenating a Weak Lawn

Your lawn cannot live without air, water and nutrients, but decaying material matted down between grass blades can smother even the healthiest-looking lawn. This decaying material is called thatch, and when a thick layer of thatch builds up, water and fertilizer may run off instead of penetrating the soil. Aerating and dethatching can help rejuvenate a lawn by restoring passageways to the soil. Late spring is an excellent time to dethatch cool-season grasses. Thatching rakes can be used, or you can use a metal rake to remove thatch by hand.

Adusting pH 

The pH of your soil has a direct impact on the health of your lawn. Test your soil to determine the pH (simple kits are available to do this). We recommend a small handful of soil taken from a depth of 3 inches to get the most accurate reading. At a pH of 6.8-7.0 nutrients are most readily available to turf grasses, and beneficial microorganisms are more active to decompose thatch and keep the soil structure healthy. If your pH is too low or too high, consider amending the soil as needed to help bring it to a more desirable level.

Crabgrass Control

On established lawns that you are not overseeding, apply a fertilizer with crabgrass control in early to mid-April. Straight Team products can be applied with separate fertilizers like Espoma Organic 18-8-6 or similar fertilizers. Reapply Team in early to mid-June for the second germination of crabgrass. Remember, crabgrass seeds start to germinate when the soil temperature reaches 50-58 degrees. Use corn gluten as an organic alternative for crabgrass control on an established lawn.

On newly seeded lawns and those seeded in late fall or during the winter months, use a starter fertilizer with crabgrass control. You will need to reapply in four weeks or however the manufacturer’s instructions indicate. Proper applications will keep your new lawn crabgrass-free.

Maintaining your lawn at a higher level, 4 inches, throughout the growing season will allow you to control crabgrass without the use of chemicals. Taller grass will shade out the crabgrass seed preventing it from germinating.

Insect Controls

An early season application of Merit or a similar insecticide will provide effective white grub control for the growing season. This preventative method tends to give better results than applying insecticides when you notice damage as it then may be too late. If you have routinely had problems with other insects, opt for products specifically targeted for those pests to ensure effective control.

A lot goes into having a lush, healthy lawn, but if you take the appropriate steps to rejuvenate your lawn in spring, you’ll be rewarded with thick, healthy, resilient turf to enjoy from early spring until snow flies again.

spring_lawn_3

spring_lawn_1

Grass sprinkler

Pre-Emergent Control of Crabgrass

Did you have a crabgrass problem last year? Well, chances are, it’s gonna be even worse this year! Crabgrass is an annual lawn weed that dies once a hard frost hits. The main problem with this pest is the tenacious seed that it leaves behind after it blooms.

Early spring is the season to control crabgrass with a pre-emergent herbicide. This chemical works by killing the crabgrass seedlings as they germinate. Here’s what you need to do:

  • Apply the pre-emergent as the forsythia is going out of bloom.
  • For newly seeded lawns, wait until you have mowed your lawn three times before applying the herbicide. This will help to avoid killing the new grass.
  • Use a spreader to apply the herbicide uniformly across your lawn.
  • Apply your pre-emergent before a light rain. This will knock the chemical off the grass blades and down to the soil surface where the crabgrass seed is germinating.
  • Do not de-thatch or aerate the lawn after applying the herbicide, as this disruption will break the chemical barrier.
  • Wait two to four months to re-seed the lawn after applying.
  • Repeat this same procedure year after year.
  • Keep you and your lawn safe. Always follow the manufacturers’ instructions.
crabgrass

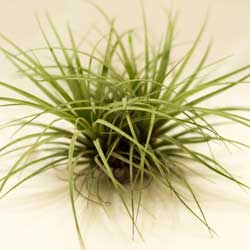
Putting on Airs: Tillandsias

Looking for something easy to grow? Tillandsias should be on the top of your list. Tillandsia is the largest genus in the Bromeliad family with over 650 species that vary in color, size, texture and shape. In their native habitat, Tillandsias attach themselves to trees and rocks using their roots. They derive the nutrients and water they need from the air, hence the common name “air plant.” And like their name implies, no soil is necessary for a beautiful, thriving specimen! This versatile houseplant is not fussy, and when given minimal care, will adapt to most home and office environments.

About Tillandsias

Tillandsias are evergreen flowering perennials, and their native range spreads from the southeastern United States to Central and South America. While they are often associated with tropical regions, these diverse plants can also be found in deserts, high mountain ranges and rocky habitats.

It is a common misconception that these are rootless plants – in fact, their roots are critical to serve as anchors and keep the plants stable, though the roots do not absorb moisture or nutrition like other plants. Instead, these plants absorb all they need through their foliage.

Caring for Tillandsias

These delicate plants are easy to care for, but there are some tricks necessary to keep them healthy and looking their very best.

  • Light
    Place your Tillandsias where they will receive plenty of light but not direct sunlight. Direct sun will dry out the leaves very quickly and can cause dehydration and wilting. Home or office fluorescent lighting works just fine.
  • Temperature
    Typical indoor temperatures are perfectly suitable for Tillandsias, and a range of 50-90 degrees Fahrenheit is ideal.
  • Water
    Once a month, soak your air plant in water for about 20 minutes. If the plant is flowering, a delicate rinse would be more appropriate so that the bloom is not damaged. When through soaking, shake off the excess water from the plant and place in an area with good air circulation so it can dry easily. In between soaks, spritz your Tillandsias 1-2 times per week with clean water from a spray bottle. Indoor heat and air conditioning rob moisture from the air. If your air plant leaves start to wrinkle or roll, this is a sign of dehydration. Give them a good soak and spritz more frequently.
  • Pruning
    It is not unusual for the outer leaves of an air plant to dry out and turn brown, and these spent leaves can simply be removed. If leaf tips dry a bit and turn brown, cut off the tip and continue with regular care. The plant will grow and look just fine.

One final note, Tillandsias have beautiful brilliant blooms but only bloom once in their lifetime. Depending on the species, the bloom may last several days to several months. Why not try several different Tillandsia varieties so you can experience these amazing blooms?

tillandsias_2tillandsias_1

Dividing Hybrid Hellebores

Hybrid hellebores bring us all sorts of happiness. These are one of the first plants to bloom in the late winter and early spring and are available in flower colors of chartreuse, cream, white, pink, red and deep purple. Hybrid hellebores are also those rare and treasured perennials that provide year-round interest, giving you the most bang for your buck and brightening your landscape in every season. As evergreens, they never lose their luster, and their flower shapes and textures are quite varied for even more interest, with a cultivar to suit any gardener’s taste. What’s not to be happy about?

A Love Divided

To keep these plants healthy and thriving, and to increase your quantity, division is a necessity. It is important to divide these plants carefully, however, or else you risk sadness with fewer blooms, lopsided plants or even losing these gems. Fortunately, it’s possible for even a novice hellebore lover to divide their plants with confidence.

  1. Divide hybrid hellebores in the spring when it is in bloom. This will also let you see how the blooms are positioned on the plant so you can divide shapes appropriately.
  2. Choose a plant that has at least 5 flower stems. Each one represents a division and will give you great new plants to bloom.
  3. Dig your hellebores up with a garden spade by inserting it deeply into the soil around the perimeter of the plant about 6 inches away from the outer stems of the clump. This will keep the root system largely intact and uninjured.
  4. Lift the clump and shake off loose soil or any trapped rocks or ensnared mulch. You can gently loosen clumps with your fingers, but take care not to damage the roots.
  5. With a garden hose, wash away any additional soil from the clump so the plant roots are exposed. This will help them get established in their new location more quickly.
  6. Divide the clump by cutting through the roots with a heavy-duty serrated knife. Make your root cuts where you see obvious natural divisions between the flower stalks.
  7. Replant your divisions at their original depth, in a shady location. Include plenty of compost in the planting hole for good nourishment. Water well and continue to keep soil from drying out until your new plants are well established.

Before you know it, you’ll have many more hybrid hellebores to enjoy! If you have a few too many, be sure to share the happiness by giving them to family members, friends, neighbors and anyone else who can fall in love with these beauties.

Helleborus orientalis

Trees For Small Spaces

There’s something about putting a tree in the ground that just feels right. In many cases, you start with just a bare trunk with a few branches and then, rather quickly, it begins sprouting new growth. You nurture your new acquisition and each year it increases in height and girth. Finally, one day, you look out the window and a magnificent mature tree is there to greet you!

Choosing Your Best Tree

Trees are a permanent addition to the landscape and therefore require a great deal of thought and planning in their selection so you are not regretting your choice as the tree matures. When choosing, not only do you need to keep climate and soil type in mind, but you will also need to consider how much space you have, both above and below the ground, and how large your tree will be at maturity. Large trees should be given the room that they need to grow and thrive. Planted in the wrong location, some large trees have far reaching roots that can damage plumbing, break underground utilities and buckle pavement, not to mention branches that can tower dangerously over your roof. Fortunately, there are many small to medium trees available that look great and cause no damage when planted close to your house, sidewalk or driveway.

Top Trees for Small Spaces

  • Acer ginnala (Amur Maple) – Multi-stemmed, rounded habit, bright red fall color, 15-20’ h x 15-20’ w
  • Acer griseum (Paperbark Maple) – Upright, irregular habit, exfoliating bark, excellent red fall color, 20-30’ h x 15-25’ w
  • Acer palmatum (Japanese Maple) – Numerous varieties, textures, colors and forms and sizes for every taste and situation
  • Aesculus pavia (Red Buckeye) – Native to the southeastern United States, red upright flowers in May to early June, flowers attract hummingbirds, 10-20’ h x 10-20’ w
  • Amelanchier canadensis (Shadblow Serviceberry) – North American native, shrubby, multi-stemmed trunk tree, white flowers in early spring, edible purplish-black fruit, reddish-orange fall color, 6-15’ h x 15-20’ w
  • Betula pendula ‘Youngii’ (Young’s Weeping Birch) – Strong weeping tendency, attractive white bark, yellow fall color, 8-12’ h x 10’ w
  • Carpinus caroliniana (American Hornbeam) – Eastern North American native, multi-stemmed, smooth muscular gray bark, yellow/red/orange fall color, 20-30’ h x 20-30’ w
  • Cercis Canadensis (Eastern Redbud) – Eastern North American native, often multi-stemmed, purple-pink flowers in early spring, 20-30’ h x 20-30’ w
  • Chionanthus viriginicus (Fringe Tree) – North American native, multi-stemmed, rounded habit, fringe-like white flowers in May to early June, golden-yellow fall color, 12-20’ h x 12-20’ w
  • Cornus alternifolia (Pagoda Dogwood) – Eastern North American native, tiered horizontal branching, white flowers late May to early June, blue-black fruit, persistent coral colored fruit stalks, yellow/reddish/purple fall color, 25’ h x 25’ w
  • Cornus florida (Flowering Dogwood) – Eastern North American and northern Mexican native, rounded habit, white or pink flowers in mid-May, reddish-purple fall color, 30’ h x 30’ w
  • Cornus kousa (Korean Dogwood) – Rounded habit, vase-shaped branching habit, flowers white aging to pink in early summer, red to purple fall color, 30’ h x 30’ w
  • Cornus mas (Cornelian Cherry Dogwood) – Multi-stemmed, rounded habit, small yellow flowers in early spring, bright red berries in the summer eaten quickly by birds, 20’ h x 20’ w
  • Crataegus viridis ‘Winter King’ (Winter King Hawthorn) – United States native, broad horizontal crown, white flowers in spring, yellow fall color, abundance of small red berries in winter, 15’ h x 20’ w
  • Halesia tetraptera (Carolina Silverbell) – native, irregular to rounded and broad shaped, pendulous white bell-shaped flowers in May, Smooth muscle-like bark, 30 – 40’h x 25 – 35’w
  • Magnolia stellata (Star Magnolia) – Multi-stemmed tree with oval habit, lightly fragrant showy white blooms in early spring, ornamental smooth silver-gray bark, 15-20’ h x 10-15’ w
  • Malus sargentii (Sargent crabapple) – Mounded habit, blooms April through early May, fragrant flowers, pink-red in bud opening to white, very showy deep red fruit held in clusters, 6-8’ h x 9-12’ w
  • Prunus cerasifera ‘Thundercloud’ (Thundercloud Plum) – Rounded habit, deep purple foliage all year around, slightly fragrant pink flowers in the spring, 20’ h x 20’ w
  • Stewartia koreana (Korean Stewartia) – Pyramidal or oval in shape, white flowers in June and July, long bloom time, excellent fall color orange/yellow/red/purple, 25’ h x 12’ w
  • Stewartia ovate (Mountain Stewartia) – Slow grower, dense with spreading branches, white flowers in July, orange to red fall color, 10-15’ h x 10-15’ w
  • Stewartia pseudocamellia (Japanese Stewartia) – Slow grower, pyramidal, solitary white camellia-like flowers June to August, excellent fall color yellow/red/purple, beautiful exfoliating camouflage bark exposed in the winter, 40’ h x 20’ w
  • Styrax japonica (Japanese Snowbell) – Horizontal branching, broad flat top at maturity, hanging white flowers from late May into June, good fall color of yellow with a reddish cast, 20-30’ h x 20-30’ w
  • Syringa reticulate (Japanese Tree Lilac) – Stiff spreading branches, fragrant showy white flowers borne in early summer on panicles up to 12″ long and up to 10” wide, 20’ h x 15’ w

Overwhelmed with small tree varieties and not sure which one is best for your yard? Let our experts help you choose the perfect tree to fit your space!

small_tree_1small_tree_2

Tree Peony: The Ancient Empress

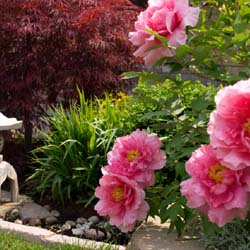
From the ancient palace gardens of China comes an elegant empress, the tree peony. Native to China, the tree peony (Paeonia suffruticosa) has been grown by Chinese herbalists, gardeners and nobility for more than 1,500 years. In 1994, China named this beauty as its national flower, giving it a treasured place in history and sparking more interest in its botanical nature worldwide.

In recent years, tree peonies have become increasingly popular and more readily available for landscape use. This plant is distinctly different from the herbaceous peony that we are so familiar with in our American perennial beds. The tree peony is a deciduous woody plant with fern-like foliage that produces larger flowers two weeks earlier than its perennial partner. These blossoms come in a wide range of shapes, colors and fragrances depending on the cultivar, providing great variety to suit any landscape.

Tree Peony Particulars 

Not sure if the tree peony will be best for your landscape? Learning more about these exotic beauties can help you decide if you want to welcome one to your yard.

  • This slow-growing woody shrub grows 4-10 feet tall with distinctive, silken blossoms in a multitude of shapes, colors and fragrances.
  • Flowers best with most vigorous blooms in dappled shade with 3-4 hours of filtered sunlight per day.
  • Tree peonies require a site with good drainage amended with plenty of organic matter. Space plants at least 4 feet apart to provide good air circulation.
  • Prefers a soil pH range of 6.5-7.0. Use organic mulch or added sulfur to lower the pH level if necessary for the best nutrition.
  • Tree Peonies are heavy feeders. Do not fertilize the first year. Foliar feed in the spring of the second year when the leaves emerge with an organic fertilizer. Fertilize again after blooming and again in the fall before dormancy. Spread organic material (compost or manure) around the base of the plant each spring and gently work into the soil for slowly-released nutrition.
  • Virtually pest- and disease-free if planted in a good location with organically-rich soil to feed from.
  • Deadhead after blooming and clean up fallen leaves in autumn to keep the tree looking its best in every season.
  • Prefers to be transplanted in the fall if moving is necessary, or plant new specimens in fall to allow them to establish before winter.

Once your tree peony is established it will reward you each year with an abundance of glorious blooms, bringing exotic flair and distinction to your landscape.

sunny garden

Sweet Peas, the “Queen of Annuals”

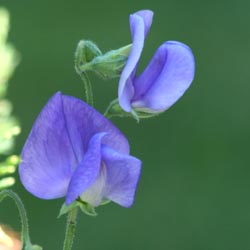
For many gardeners, it’s not the tulip or daffodil to forward to at the end of winter, it’s the sweet pea (Lathyrus odoratus) that declares, “spring is here!” The colors and sweet fragrance of these climbers announce the coming of warmer days like no other.

Choosing Sweet Peas

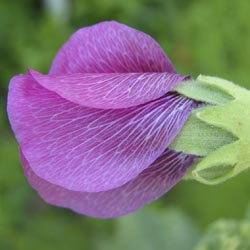
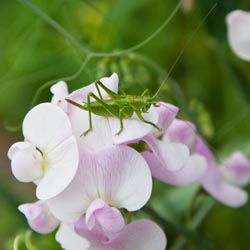
The hardest part of growing sweet peas is choosing from the riot of colors. From the palest of pastels to the most vivid of hues (including stripes), reds, pinks, white, blues, purples, yellows… the list seems endless. Many gardeners buy mixed packages of seeds to avoid the decision and to add a riot of spring color to the garden and landscape.

Beyond color, it is important to carefully consider different types of sweet peas. If the seed package says “tendril” this means the plants have small green growths to attach to a surface or netting to help the vine grow upright. This is how the taller sweet pea vines support themselves as they grow to 6′ (or even taller!), and they will need an appropriate trellis, arbor, arch or other structure to reach their full beauty. The varieties with no tendrils remain more compact, making them great in containers. Some of these will trail downward, creating a beautiful draping effect. Other dwarf non-vining varieties act as annual fillers in the mixed garden bed or as borders.

Growing Sweet Peas

These beauties are super easy to grow. To improve the germination rate, especially of the darker colors, use nail clippers to gently nick the seed coat and soak overnight before planting. This will allow thin shoots to pierce through the thick seed covering more easily so they can grow effectively. Sow the seeds 2″ deep in rich, well-draining soil in a full to partial sun location. If the soil is heavy, add compost to improve the texture and nutrition. Keep the soil moist, but avoid saturated soil that can drown small seeds or delicate roots. Germination should occur within 10-28 days. Continue even and consistent watering. When seedlings are 4-5″ tall, thin them to create 5-6″ spacing between plants. To encourage bushy and compact plants, pinch the tips when three sets of leaves form. Generally, do not provide additional fertilizer, otherwise the plants may be lush but the flowers will be sparse.

Impatient gardeners or those who may have a shorter growing season may also be able to purchase seedlings from a garden center. This way there will be fragrant sweet pea bouquets a month earlier, and there’s no need to miss out on the sweetness if the ideal seed planting date has passed. Removing flowers when transplanting will encourage stronger root growth to produce larger flowers later if desired.

Seeds for perennial sweet peas are also available. Unlike annual sweet peas, the perennial plant will continue to bloom throughout warm, humid summers. Be aware, however, that annual sweet peas tend to have a gloriously heady scent, but this is a feature sorely lacking in the perennial form.

Enjoy the Beauty

Those long-lasting, colorful and fragrant flowers are so sweet in large loose arrangements. They’ll easily last a week if the water is changed daily and a bit of the stem is snipped off each time to improve water uptake. Remember, the best way to extend the sweet pea blooming season is by daily picking early in the day. Or, simply enjoy these beautiful blooms by walking through the garden each day and relaxing in their delicious scent and colorful blooms.

Fall Flowers – Really!
Gardeners who just can’t get enough of annual sweet peas don’t have to mourn their loss in spring. Instead, grow them again in the autumn! These fast-growing flowers will thrive just as well in the cool autumn as they did in the early days of spring. Just remember to provide enough time for flowering before the first frost hits, and you’ll love using sweet peas to say goodbye to the gardening season in fall just as you said hello to them in spring.

sweatpea_1_250x250
sweetpea_4_250x250sweatpea_2_250x250Lathyrus in little vases

Shade Gardening: A Natural Opportunity

Although developing a garden for a shady area may require a little extra planning, some more thought and a bit more effort than sunny spaces, there are many opportunities to grow remarkable, unusual plants in the shade garden. Shade-loving plants are often noted for their foliage and can be combined to produce appealing contrasts in form, texture and color. From the glossy, dark greens of camellias and rhododendrons to the soft, silvery lamiums and the bold-textured, brownish-purple leaves of bergenia, the diversity of foliage available is positively breathtaking!

Defining Shade

The term “shade” encompasses many light conditions. Shade can range from dense darkness to the light-dappled shade under a birch tree. Most plants require at least a few hours of direct light each day (light shade) to look their best, especially if they feature bright colors in foliage or blooms. Some plants, however, do best in an abundance of filtered light (medium shade), especially if the shade is provided in the afternoon to cut the strongest rays of the sun. In the meantime, a few plants can thrive in the darkness of a forest (dense shade), without ever being exposed to bright, direct sunlight.

Other factors you will need to consider when planting your shade garden are the amount of moisture your shady spot receives and the soil conditions. The soil under large trees is usually dry because of the “umbrella” affect created. Other locations may have soggy soil that will only allow bog-type plants to grow. The soil’s drainage, pH and texture will all have to be taken into account to create the best shade-loving garden.

Not sure where to start for finding plants for a shade garden? Top shade-loving perennials and their requirements include…

Perennials for Dry Shade:

  • Convallaria majalis (Lily of the Valley)**
  • Dicentra ‘Luxuriant’ (Bleeding Heart)*
  • Epimedium perralchicum, pinnatum, pubigerum (Bishop’s Hat)*
  • Geranium maculatum, endressii, nodosum (Cranesbill)*
  • Helleborus foetidus*
  • Lamium maculaturm (Deadnettle)*
  • Polygonatum multiflorum (Soloman’s Seal)*

Perennials for Cool, Moist Soils in Shade:

  • Adiantum pedatum (Maidenhair Fern)**
  • Athyrium nipponicum ‘Pictum’ (Japanese Painted Fern)**
  • Cyrtomium (Japanese Holly Fern)**
  • Dryopteris erythrosora (Autumn Fern)**
  • Dryopteris marginalis (Marginal Shield Fern)**
  • Epimedium grandiflorum, warleyense*
  • Helleborus viridus, orientalis (Lenten Rose)*
  • Mertensia virginica (Virginia Bluebell)**
  • Polystichum acrostichoides (Christmas Fern)**
  • Polystichum setiferum ‘Divisilobum’ (Soft-Shield Fern)**
  • Tiarella cordifolia (Foam Flower)*
  • Tricyrtis formosana (Toad Lily)*
  • Trillium sessile, grandiflorum**
  • Trollius europaeus*

Perennial Groundcovers in Shade:

  • Acanthus mollis (Bear’s Breech)*
  • Aegopodium podagraria ‘Variegatum’ (Goutweed)*
  • Asarum europaeum (European Wild Ginger)*
  • Galium odoratum (Sweet Woodruff)*
  • Lamiastrum galeobdolon ‘Florentinum’ (Variegated Archangel)*
  • Lamium maculatum ‘Beacon Silver’ (Dead Nettle)*
  • Luzula sylvatica ‘Marginata’*
  • Tiarella cordifolia (Foam Flower)*
  • Vinca minor*
  • Waldsteinia ternata (Barren Strawberry)*

Climbers for Shady Walls & Fences:

  • Akebia quinata, trifoliata
  • Clematis ‘Nelly Moser’
  • Euonymus fortunei ‘Coloradus’
  • Hedera helix (English Ivy)
  • Humulus lupulus (Golden Hops)
  • Lonicera japonica ‘Halliana’ (Japanese Honeysuckle)
  • Parthenosis henryana, quinquefolia, tricuspidata

*Does best in light shade
**Does best in medium to dense shade

shadeperennials1shadeperennials3

shadeperennials2

Succulent Container Garden

Have you noticed how a container garden can really jazz up a front entryway, back deck or porch? Perhaps you’ve thought twice about including this addition to your plantscaping because you just don’t have time every day to water. 

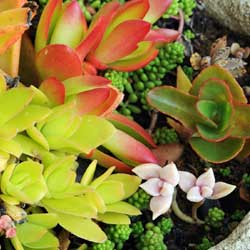
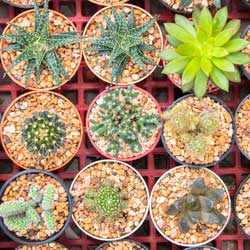
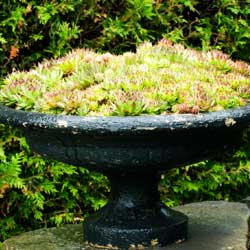
Cheer up! You can plant a container with succulents (plants with fleshy or thickened leaves, stems or roots) and you will not have to worry about watering frequently. Succulent container gardens are relatively carefree, and they’re so easy that you don’t have to limit yourself to just one. If one container makes a statement, several will create a conversation! 

Succulent Container Garden Tips and Tricks

To have the greatest success with your new succulent container garden, consider… 

  • Exposure
    Full sun is a must for all succulents and will help show off their subtle colors and textures. If your viewing location has less than adequate sun, place your succulent garden in a full sun area for the majority of the day and move to your desired location when you have company or time to enjoy it yourself. Remember to move it back out into the sun when company leaves.
  • Containers
    Because succulents do not have extensive root systems, your chosen containers may be shallow. Too much soil can hold excessive water causing the succulent’s roots to rot. Perhaps a strawberry pot would make the perfect focal point at your front door, and many front doors look great with a single shallow round planter sitting on the stoop. If you have several steps to the door, try a pot on each step. How do you want your front entrance to say “hello”?
  • Height
    Think about varying the heights of your containers. Perhaps your containers will require a pedestal or something else for elevation. This could be an inverted pot, a table, shelf or even pot feet. You may even consider hanging your container for elevated elegance. Whatever you choose, it’s important to remember succulents require excellent drainage. Therefore, the containers must have holes.
  • Soil
    All succulents need fast draining soil. Pre-mixed soil is available that is specifically blended for succulent container plantings. You may also use a general all-purpose potting mix and add perlite, coir or sand to increase the drainage sufficiently.

Plants for Your Succulent Container Garden

When making your plant selection, it is fun to let your imagination go wild and embrace the full range of amazing succulents available. As a good container gardening rule of thumb, Use a thriller (something stunning to catch the eye), a filler (a sturdy, reliable choice to fill in bare spots) and a spiller (a trailing plant to blur the container edges) and you’ll never go wrong. 

Succulents come in an extensive variety of colors, striking shapes and varying sizes. As when planting any container, evaluate plant color, texture and shape when making your selections. You may feel overwhelmed when choosing your plants. If you can’t decide, here is a simple “recipe” for planting one 16″ container to be seen from all sides. Maybe it will give you some ideas: 

  • 1-thriller (Euphorbia tirucalliSticks on Fire‘) planted in the middle.
  • 3-fillers (Kalanchoe blossfeldiana) to surround the thriller and provide texture or color contrast
  • 5-spillers (Sempervivum arachnoideum) to drape over the container’s edge.

As an extra bonus, many succulents bloom, adding extra unexpected beauty. Blooms can be few and far between, however, but they will be exciting and rewarding when they are spotted. 

The Importance of Topdressing 

After planting, gently brush off any residual soil from the succulents’ leaves. Add more interest by topdressing the container. This is a layer of material will give your container garden a finished appearance. Desert type plants look great with a thin layer of light tan-colored gravel or red lava rocks. Create sparkle with sea-glass toppings or add a clean, contemporary look to Zen-like or Asian inspired plantings with smooth black river stones. Other popular top dressings include glass marbles, colored aquarium gravel or tiny seashells. You might even add a fairy garden surprise in the container, such as a miniature hut, hidden gnome or other quaint character who will call your succulent garden home.

Most importantly, have fun!

succulent-2

succulent-3

succulent-1

Raising Root Crops

Root crops are among the easiest vegetables to grow, and often the first and last vegetables in the garden to mature. Your garden may produce enough vegetables to take you through the entire year and, if kept correctly, root crops will last a long time in storage. These vegetables are great to grow, even in a small space. Many root crops are frost tolerant and with most, the tops, or greens, are also edible. 

What Root Crops Need 

To get the best harvest of root crops, no matter which types you opt to add to your garden, you need to meet their cultivation needs. 

  • Soil
    Root crops grow best in deep, loose, rock-free soil that will allow the roots to form and grow easily. To nourish the plants, supplement the soil with plenty of organic matter.
  • Fertilization
    Root crops require a high phosphorus fertilizer for optimum growth, but check the needs of individual crop types to choose the best mixture. Always apply fertilizer according to the proper directions to prevent burning.
  • Temperature
    Most root crops are considered cool season vegetables and are planted both early and late in the growing season. Warm days and cool nights are most beneficial for root expansion.
  • Light
    Full sun is best.
  • Planting
    Seeds should be sown 2-3 weeks before the last expected frost date and subsequent plantings made every three weeks thereafter as weather permits (some exceptions apply). Planting depth varies depending on the type of plant; follow the directions on the seed packet. After seedlings emerge, thin to desired spacing as determined by the diameter of the root at harvest time. Beet and turnip tops that are thinned are edible raw as salad greens or they may be cooked. Root crops are generally not transplantable because they have a tap root.
  • Mulch
    Mulch plants that have already been thinned with salt marsh hay to retain soil moisture and minimize weed growth.
  • Pest Control
    Maintaining appropriate cultivation requirements will reduce or eliminate the need for pest control. As with all vegetables, it is important to rotate crops each year. Rotating root crops will discourage root weevils.
  • Basic Storage
    All root crops may be stored for a time before being eaten. In general, store at 32 degrees Fahrenheit and 95 percent humidity. Leave the crops in the garden as long as weather permits, then dig. Store the harvest in a root cellar or refrigerator.

Tips for Favorite Root Vegetables 

  • Carrots – Plant in sandy soil if you want the classic, long, narrow type.
  • Beets – You may harvest 1/3 of the tops without affecting the root.
  • Garlic – Best planted in the fall.
  • Horseradish – Use caution when planting this aggressive perennial.
  • Kohlrabi – Has a mild, sweet cabbage flavor.
  • Leeks – Flavor is best if harvested after a light frost.
  • Onions & Shallots – Plant from seed or sets.
  • Potatoes – Best planted from ‘seed potatoes’ to match variety.
  • Radishes – Mature in as little as three weeks.
  • Sweet Potatoes – Warm weather root crop, will not withstand a frost.
  • Turnips – For a fall crop, sow seeds in midsummer.
raising-root-1

raising-root-2

raising-root-3

Attracting Hummingbirds

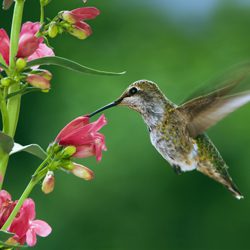
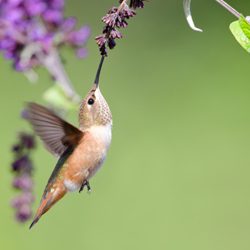
It is an awesome sight to capture a glimpse of a ruby-throated hummingbird hovering over the flower garden on a sunny summer morning. One or two a year may be seen seeking food in the landscape, sampling everything in their path. Unfortunately, they leave as rapidly as they arrive. This season, attract more of these miniature avian anomalies and keep them returning year after year. 

What Hummingbirds Want 

You can charm hummingbirds to your yard with a selection of their favorite nectar-producing flowers. Hummingbirds are not attracted by scent but by color. Red happens to be their favorite, however, pink, purple, blue, orange and yellow will also catch their eye. Tubular flowers accommodate these birds’ long, narrow bills. Select a wide variety of plants that bloom at different times to keep hummers well fed all season long. Refrain from using insecticides when attracting hummingbirds, as they rely on insects for protein in their diets – especially during the summer nesting season when young hummers need extra protein for healthy growth. 

Hanging a feeder is another way to encourage these visitors. Choose one with red parts to resemble the flowers that they prefer. Fill the feeder with a mixture of one part sugar to four parts hot water to help the sugar dissolve. Fill the feeders after the mixture has cooled. Easier yet, fill with instant nectar purchased at our store. Clean feeders every 2-3 days early and late in the season, and daily in hot weather. 

Plants That Attract Hummingbirds 

The easiest way to keep hummingbirds fed without the hassle of refilling and cleaning feeders is to provide a lush landscape filled with their favorite flowers. Fortunately, that’s easy to do because these birds will sample nectar from a wide variety of blooms. No matter what your yard size, soil type, sun exposure or moisture levels, there are plants you can add to the landscape to entice hungry hummers to stop for a snack. 

Annuals

  • Flowering Tobacco
  • Four-O-Clocks
  • Fuchsia
  • Geraniums
  • Impatiens
  • Mealy Blue Sage
  • Mexican Bush Sage
  • Nasturtium
  • Petunia
  • Pineapple Sage
  • Red Salvia
  • Zinnia

Bulbs

  • Canna
  • Gladiolus

Perennials & Biennials

  • Bugleweed
  • Bee Balm
  • Beard Tongue
  • Cardinal Flower
  • Columbine
  • Coral Bells
  • Daylily
  • Delphinium
  • Gaura
  • Hollyhocks
  • Hosta
  • Phlox
  • Spiked Gayfeather
  • Lily
  • Rose Mallow
  • Russell Hybrid Lupine

Vines

  • Cypress Vine
  • Honeysuckle
  • Morning Glory
  • Scarlet Runner Bean
  • Trumpet Vine

Shrubs

  • Azalea
  • Butterfly Bush
  • Glossy Abelia
  • Lilac
  • Weigelax

Trees

  • Bottlebrush Buckeye
  • Catalpa

Fun Hummingbird Facts 

Why not learn a little more about these fascinating birds? The more you know about their amazing abilities and unique characteristics, the more you’ll appreciate having them visit your yard! 

  •  Hummingbirds are the smallest birds in the world.
  • There are over 340 species of hummingbirds and they are found only in the western hemisphere. Most species are found in the tropics.
  • Hummers can hover as well as fly straight up and down, sideways, backwards and even upside down.
  • Hummingbirds beat their wings about 75 times per second.
  • They can drink eight times their body weight and consume about 500 insects daily.
hummingbird2

hummingbird3

hummingbird1

Tomatoes and Peppers – A Gardening Tradition

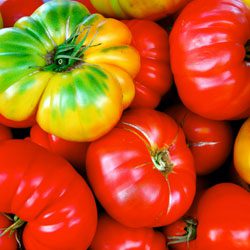
Tomatoes and peppers are two crops you can never have too much of. They freeze well without the difficulty of blanching, and although the texture of tomatoes disintegrates, the flavor remains good. Both tomatoes and peppers offer brilliantly colored fruit that can be particularly attractive in the garden or in containers. Both have the same requirements – a sunny, nutrient-rich site that is well-drained. To prevent disease problems, neither should be planted in a location where tomatoes, peppers or eggplants were grown the previous year. If you’re not growing both tomatoes and peppers, you’re missing out! 

Tomatoes 

Tomatoes come in two different types: determinate and indeterminate. Determinate, or bush varieties, grow 1-3’ tall. When flowers form at the vine tips, the plant stops growing. This means fruit sets all at once – which makes them excellent for canning. Indeterminate types, on the other hand, have sprawling vines that grow 6-20’ long, and keep producing and growing until frost. Indeterminate vines should be pruned to ensure that they do not put too much energy into vine production. Pinch out sideshoots (“suckers”) as they develop to prevent excess growth and encourage more fruit. 

Tomato plants should be set deep in the soil with the first leaf just above ground level. Leggy plants can even be planted horizontally as roots will develop from the planted stem. 

Blossom-end rot can be a common problem with tomatoes. It is a leathery scar that develops on the bottom of the fruit. This is caused from a deficiency of calcium and/or irregular watering. To ensure a supply of calcium, work gypsum into the soil before planting and maintain regular watering. Feed tomatoes once a month with Garden-tone or use Miracle-Gro weekly. Apply mulch around all vegetable plants to help keep the soil moist and cool. 

Another disease, early blight, makes dark, depressed areas on the leaves just as first fruit appears. Late blight appears as black, irregular, water-soaked blotches on leaves and dark-colored spots on fruits. Both diseases usually occur during cool, rainy weather. Destroy plants to keep from infecting other plants and select resistant varieties to minimize future outbreaks. 

Spread by aphids, tobacco mosaic virus will appear as yellow, mottled foliage with fruit possibly being stunted. Severely affected plants should be destroyed. Aphids should be controlled to prevent infection. 

Peppers 

Ranging in selections from crispy sweet to fiery hot and from big and blocky to long and skinny, peppers should be cut from the plant rather than pulled off. Most sweet peppers become even sweeter when they mature as they turn from green to bright red, yellow, orange or even brown or purple. As hot peppers mature and turn red, they get hotter. 

Peppers are also susceptible to blossom end rot and tobacco mosaic virus the same as tomatoes. The same measures should be taken to prevent infection. 

Although we’ve touched on the most common problems with tomatoes and peppers – if you’re not sure, bring in a sample to let one of our experts correctly diagnose the problem and help you find a solution. 

Types of Tomatoes & Peppers 

Tomatoes

  • Beefsteak – Large slicer
  • Better Boy (VFN) – Medium
  • Big Beef – Large slicer
  • Big Girl (VF) – Medium
  • Celebrity (VFNTA) – Medium
  • Champion (VFNT) – Large
  • Early Girl (VF)- Medium, early
  • Husky Gold (VF) – Medium yellow
  • Husky Red (VF) – Medium
  • Lemon Boy (VFN) – Yellow
  • Patio – Self-supporting, medium
  • Roma (VF) – Medium
  • Sunray – Yellow
  • Supersonic – Medium to large
  • Supersteak – Large slicer
  • Sweet 100 – Cherry

Notations after the tomato variety designate their resistance to the following diseases: V-Verticillium, F-Fusarium, N-Nematodes, T-Tobacco Mosaic, A-Alternaria 

Peppers

  • Biscayne Italian Fryer – Sweet
  • California Wonder – Sweet
  • Cherry Hot – Hot
  • Cubanelle – Sweet
  • Golden Bell – Sweet
  • Habanaro – Hot
  • Hungarian Wax – Hot
  • Italian Gourmet Fryer – Sweet
  • Ivory Bell – Sweet
  • Jalapeno – Hot
  • Jupiter Green – Sweet
  • Lady Bell – Sweet
  • Lilac Bell – Sweet
  • Long Hot Cayenne – Hot
  • Mandarin (Orange Bell) – Sweet
  • Sweet Banana – Sweet

In The Kitchen 

There are hundreds of delicious recipes to try with either tomatoes, peppers or both at once, whether they are fresh or canned. Try this favorite tomato recipe, and use your strong crops of both of these fruits to experiment with different flavors and tastes all year long! 

Scalloped Fresh Tomatoes

  • 1 medium onion, chopped
  • 2 Tbsp butter or margarine
  • 4 medium, ripe tomatoes, sliced
  • 1 cup grated sharp cheese
  • 1 cup fine, soft bread crumbs
  • 1 cup dairy sour cream
  • 2 eggs, well-beaten
  • ½ tsp salt

Cook onions in butter until tender. Place half the tomatoes in a 10 x 6 x 11 ½” baking dish. Top with half each onions, cheese and crumbs; repeat. Mix remaining ingredients. Pour over top. Bake at 350 degrees for 35-40 minutes. Serves 4-5.

tomato-pepper-2

OLYMPUS DIGITAL CAMERA

Jump Start Your Pond

Are you ready to get your pond started up for another beautiful spring and summer? It can be a big job to rejuvenate such a large water feature so it remains balanced and healthy after a long, harsh winter, but with a few careful steps, your pond can be back in shape in no time.

When to Reopen Your Pond

It is important that you don’t try to get your pond started too early in the season. All risk of hard freezes should be long past, and even nightly frosts should be tapering off or already finished before you restart your pond. The exact time will vary based on your pond’s size, depth and location, as well as your ambient weather conditions and the pond’s overall ecology. For example, a smaller, shallower pond in a sunny area will be warmed up and ready to restart before a larger, deeper pond in a shady spot. It can be helpful to keep a journal or calendar from year to year to note when you reopened your pond and how successful your efforts were. In time, you’ll be able to adjust your calendar easily without risking the health and wellness of your pond, even if annual conditions change.

Easy Steps to Restart Your Pond

When you are ready to jump start your pond…

  • Remove the netting that was set in place last fall. If needed, clean and make repairs to the netting right away so it will be ready to use next fall. Store it safely where it will be easy to reach when needed again.
  • Remove excess sediment from the bottom of the pond with a vacuum or a net. It is not necessary to remove every bit of sediment, but most of the debris should be removed so the pump can function effectively.
  • Test last year’s pump and replace if necessary. Be sure to test any additional moving or electrical features, such as waterfalls, fountains or lighting around the pond so repairs can be made if needed.
  • If water level is low, add fresh water to desired height. Avoid overfilling the pond, however, which can disrupt the essential chemical and microbial balance that keeps the pond healthy.
  • Add de-chlorinator as necessary to remove heavy chemicals from the water that has been freshly added to the pond. As with any chemical treatments, be sure to test the water several times to be sure you reach the proper balance.
  • Place aquatic plants in the pond and begin fertilizing to meet their nutritional needs. These may be plants that you’ve overwintered in a safe location, or you may choose to add new or exotic plants in late spring.
  • Begin feeding fish when water temperature stays above 55 degrees. Keep feedings minimal at first as fish come out of dormancy, as excess food will only rot and lead to greater bacteria and algae growth in the water.

It is perfectly natural for your pond water to turn green at first, but with the proper plants it should balance itself out in no time. It may take a few days or even a couple of weeks for your pond to return to its healthy, active state, but if you’re restarted it properly, you shouldn’t have any major problems.

pond

Ladybug or Lady Beetle?

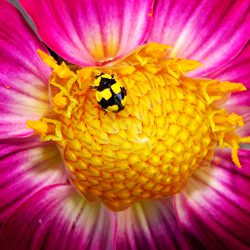
The different names given to ladybugs are almost as numerous as the number of species. But bug or beetle, understanding more about these garden guests can help you better appreciate their diversity and all the help they can offer in your garden and landscape.

What’s In a Name

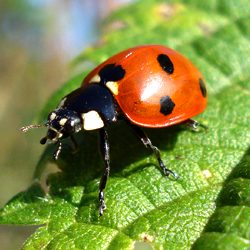
You may call them ladybugs (although they are not really bugs), lady beetles (they are technically beetles), lady birds or in Germany you would say “Marienkafer” (Mary’s beetles). In North America, there are more than 350 distinct species of ladybugs, and there are more than 4,000 ladybug species around the world. Most species can be identified by the pattern of spots on their elytra (flight wing covers). In many areas, these helpful insects go by different common names, including lady fly, lady cow, little hen, insect of fortune, Mary’s bug and more.

About These Bugs

Lady beetles are members of the beetle family Coccinellidae, which means “little sphere.” In their life cycle, a lady beetle will go through egg, larval, pupal and adult stages, though the length of each stage and how quickly the beetle proceeds through each one will vary depending on the species and local conditions. Lady beetles may live in shrubs, fields, trees and logs.

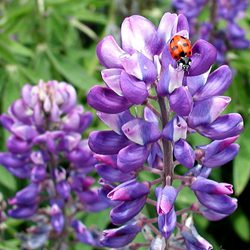
Lady beetles’ favorite food is the notorious aphid, though they do eat a variety of different insects. A female lady bug has huge appetite, eating from 75-100 aphids per day, while the male eats about 40 per day. This makes them ideal garden helpers, and many gardeners deliberately release swarms of lady beetles to help control aphid outbreaks. Most lady beetles are predators, but a few are plant eaters, and can be crop pests if not controlled appropriately. Crops most at risk from certain lady beetle species include potatoes, beans and different types of grain. When lady beetles swarm in vineyards and are inadvertently pressed with wine processing (it inevitable that some insects are part of the process), they can impact the taste of the resulting wine.

Self-Preservation

Lady beetles have some surprisingly innovative ways of protecting themselves. First of all is their coloring. Most predators know that bright colorings mean that their victim would likely taste gross, usually sharp or very bitter, and bold colors can even indicate poisons or stinging. While lady beetles don’t sting, their bold red and black coloration can easily mislead predators. Lady beetles also produce a pungent odor when threatened or may just play dead. As well, the lady beetle larvae is kind of alligator looking, so not many predators will not mess with it.

Ladybugs and lady beetles are fascinating insects, well known to gardeners throughout the world. The more you know, the more you’ll respect and appreciate these iconic insects.

ladybug_article3ladybug_article2ladybug_article1

Creepers & Crawlers: Ground Covers for Walkways

The durability of some plants is absolutely amazing. A number of them are so robust that they may even be tread on! These are the plants to choose when filling in the space between pavers, walkways, patios and steps. Placing plants in the gaps of your hardscape will soften its appearance and will keep weeds from taking over that space, as well as prevent erosion that will loosen stones. These ground covers will creep and crawl around the stone bringing the garden to your feet and closer for you to enjoy. 

There are resilient, low-growing, easy maintenance plants for just about any situation. Many even have showy flowers. But which is right for your yard? Before planting, scope out your site. Take into consideration the amount of sun or shade the plant will receive, the amount of foot traffic the area gets and the size of the space that the plant needs to fill. Still not sure which groundcover will work best? Stop in and speak with a member of our knowledgeable staff. We can help make your selection easier. 

Groundcovers for Moderate to Heavy Foot Traffic 

Areas that receive moderate to heavy foot traffic – backyard patios, front walkways, terrace steps, etc. – can be the most difficult to fill in. Depending on the light the site receives, some of the most popular groundcover options include… 

Full Sun 

  • Alpine Cinquefoil (Potentilla) – 12” spread, yellow flowers, green foliage
  • Carpet Speedwell (Veronica) – 3” spread, light blue flowers
  • Creeping Sunshine Speedwell (Veronica) – 12” spread, gold foliage
  • Creeping Thyme Doone Valley (Thymus) 23” spread, variegated gold foliage
  • Creeping Thyme Purple Carpet (Thymus) 18” spread, mauve flowers
  • Creeping Thyme Elfin (Thymus) –  8” spread, light pink flowers
  • Creeping Thyme Coccineus (Thymus) –  18” spread, red flowers
  • Creeping Thyme Pink Chintz (Thymus) 23” spread, deep pink flowers
  • Creeping Thyme Ruby Glow (Thymus) –  18” spread, purple-red flowers
  • Golden Stonecrop (Sedum) – 23” spread, yellow flowers and foliage
  • Hartington Silver Thyme (Thymus) 12” spread, light pink flowers
  • Mediterranean Creeping Thyme (Thymus) – 18” spread, deep pink flowers
  • Nutmeg Thyme (Thymus) – 18” spread, scented foliage
  • Orange-scented Thyme (Thymus) – 12” spread, scented foliage
  • Pink Pussy-toes (Antennaria) – 12” spread, deep pink flowers
  • Pussy-toes (Antennaria) 12” spread, white flowers
  • White Moss Thyme (Thymus) – 18” spread, white flowers
  • Whitley’s Speedwell (Veronica) – 23” spread, deep blue flowers
  • Woolly Thyme (Thymus) – 23” spread, grey-green foliage

Sun to Part Sun 

  • Blue Star Creeper (Isotom) 12” spread, light blue flowers
  • Black Brass Buttons (Leptinella) 12” spread, purple-black foliage
  • Black-Leaved Clover (Trifolium) – 18” spread, green and purple foliage
  • Celestial Spice Pratia (Pratia) 8” spread, deep blue flowers
  • County Park Pratia (Pratia) – 12” spread, deep blue flowers
  • Creeping Mazus (Mazus) – 18” spread, mauve flowers
  • Creeping Wire Vine (Muehlenbeckia) – 29” spread, wiry stems
  • Cushion Bolax (Azorella) – 8” spread, yellow flowers
  • Green Brass Buttons (Leptinella squalida) – 12” spread, yellow flowers
  • Irish Moss (Sagina subulata) – 12” spread, small white flowers
  • White Creeping Mazus (Mazus) – 18” spread, white flowers
  • Miniature Brass Buttons (Leptinella) – 16” spread, white flowers
  • Rupturewort (Herniaria) – 12” spread, tiny leaves
  • Scotch Moss Golden (Sagina) 12” spread, golden foliage
  • Turkey Tangle Fogfruit (Phyla) 23” spread, gray-green foliage
  • White Creeping Pratia (Pratia) 12” spread, white flowers 

Shade 

  • Corsican Mint (Mentha) – 12” spread, mauve flowers
  • Miniature Creeping Jenny (Lysimachia) – 18” spread, yellow flowers
  • Miniature Wintercreeper (Euonymus) – 18” spread, leathery foliage
Off The Beaten Path

Espalier

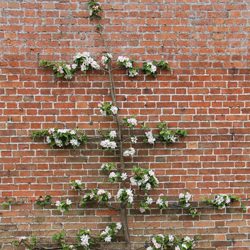
Espalier is the process of training trees or shrubs, by pruning and trellising, to create a vertical, two-dimensional, formal pattern. The purpose of espalier is to artfully train a tree to grow in limited space, to provide pattern and texture on a solid wall, to grow fruit in a limited space and to create privacy in the garden.

It is possible to purchase plants that have been already been espaliered, however, your selection of plant choices will be limited and it’s not nearly as much fun as doing it yourself. Fortunately, it’s not as hard to do as it may sound!

Espalier Basics

To begin, choose a spot in full sun where you have garden space at the foot of a bare wall or fence. It is important to remember to leave about 6 inches of space between the wall or fence and the plant to allow sufficient room for roots to grow. A wire frame is often used in place of a trellis when choosing this type of plant training, though a trellis may be used when training a plant for privacy when no wall is available. Screw eyebolts into the side of a building at 1-foot intervals, horizontally and vertically. Tie wire between the bolts to create a grid. There are many styles and patterns, of espalier to choose from, some simple, some complicated. It may help to layout your design on graph paper first to solidify your plan and to visualize its complete form.

Select a tree that is young as its branches will be more flexible and more readily trainable. All branches must be pruned from the side that will be flush with the wall or trellis. Tie the main trunk to the wire grid with a twist tie, then prune away all branches that grow forward leaving only laterally spreading branches. Next, begin tying the lateral branches to the frame at approximately a 45-degree angle from the ground. You now have the beginnings of an espalier! This process will require annual maintenance. Branches chosen to be part of your original design should be retrained and retied yearly. Check the ties twice a year to make sure that they are not strangling the branches, and loosen them as necessary. Branches that are not needed to maintain your design should be removed.

Pruning Your Plant for the Best Espalier

Pruning and training will continue throughout the life of your chosen plant. Generally, most major pruning is done in late winter to early spring before new growth begins, but pruning at different times can have different advantages. Pruning during the dormant season or early spring, for example, will stimulate new growth that can help fill a pattern in more quickly. Pruning in mid-summer (June, July) tends to have a dwarfing effect, ideal to keep a more mature plant under control in a smaller space. Pruning should not be done in late summer, however, as this could stimulate new growth that will not have time to harden off before a heavy frost sets in.

An espalier design can take years to fill into a luxurious form, but the effort and meticulous nature of this type of plant training can be well worthwhile for a unique and eye-catching feature in your garden.

Apple Fruit.

Magnificent Mountain Laurels

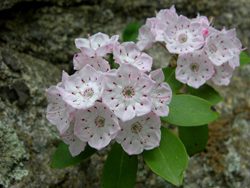
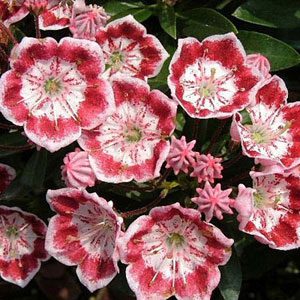
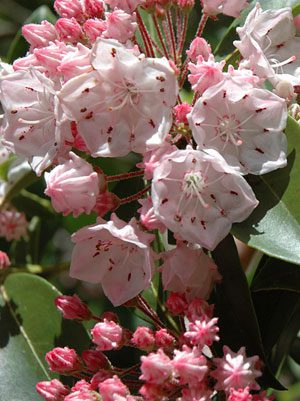
An undeniably beautiful shrub in any season, mountain laurel (Kalmia latifolia) explodes into bloom in late spring to early summer. One of our nation’s greatest contributions to the botanical world, mountain laurels possesses beautiful, shiny, deep green foliage. They boast legendary clusters of star-like buds opening to delicate cup-shaped flowers with frilly edges. The flower buds emerge red, open pink or white and reveal purple dappled markings inside the flower, giving this shrub its nickname “calico bush.”

A native from Maine to Florida, these broadleaf evergreens intrigue but also sometimes frustrate the home gardener. With so many magnificent specimens growing wild in the eastern forests, why is it sometimes difficult to grow mountain laurel in the landscape?

Location

First, you will need to choose the right site. Mountain laurel will tolerate sun if there is adequate moisture and the root area is cool, but partial shade is preferable and shade will do if there is some morning sun available. Plant your mountain laurel where it has plenty of room to grow to maturity; it should not need to be pruned except to remove dead or damaged wood. Mountain laurels are slow-growing, reaching 4-8 feet over 10 years. This contributes to their irregular habit, creating an elegant specimen.

Planting

As a member of the heath family, which includes rhododendron, mountain laurel requires well-drained, rich, acidic soil. Replicate these conditions and your plant should thrive. Your soil pH should be 5.0-5.5, but if your pH is higher than 6.5 your mountain laurel may not survive and certainly will not thrive. Laurels seem to perform best in raised beds, heavily amended with sphagnum peat moss or finely ground pine bark. To plant, dig a hole three times as wide as the root ball. Set the plant at or above the depth as it was growing in its container or the size of the root ball. Do not plant it more deeply. Mix a handful of superphosphate to the amended planting soil, then backfill the hole and water thoroughly. Add a 3-inch layer of pine bark mulch to keep the roots cool in hot weather and to retain soil moisture. Check plant often throughout the season and water before soil dries out. Fertilize twice yearly with Holly-tone; once in the spring and half strength in the autumn to provide adequate nourishment.

Selections

There are many different mountain laurels to choose from, and the most popular varieties include…

  • Alpine Pink – Rich pink buds open to medium pink with a white throat.
  • Carousel – Starburst pattern inside the corolla. Good growth.
  • Hearts of Fire – Red buds open to a deep pink flower.
  • Nipmuck – Intense red buds open cream white to light pink while the back of the corolla is dark pink.
  • Olympic Fire – Large deep red buds open to pink flowers.
  • Pinwheel – Maroon flowers edged in white with a cinnamon-maroon band that almost fills the center of the corolla.
  • Snowdrift – Compact, mounded plant with pure white flowers.
  • Elf – White flowers on a dwarf plant.

* All plants subject to availability

Mountain laurels can be magnificent specimens to add to your landscape, try one today!

laurel_2laurel_3

laurel_1