Monthly Archives: November 2024

Fall Lawn Care

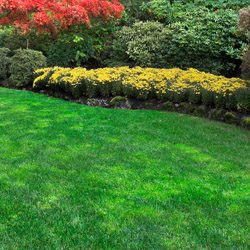
Fall is the best time of the year to overseed your existing lawn or establish a new lawn. If your lawn is a bit thin, has bare patches or needs good care, now is the time to take care of it so it can become thoroughly established before warm temperatures arrive in spring.

Overseeding A Weak Lawn

A weak lawn may have thin or scraggly patches, seem overrun with weeds or have bare patches that are difficult to keep green and lush. Overseeding can help eliminate these problem areas and create a more consistent, luxurious lawn.

  1. Spray broadleaf weeds with a selective herbicide and wait 2 weeks for the weeds to disappear. Several treatments may be necessary if the yard is thick with weeds.
  2. Take a soil sample of your lawn to determine the pH. A garden extension service can help determine pH levels, or home test kits are available.
  3. Mow shorter than normal and rake clean to remove unnecessary debris that may keep seeds from reaching the soil.
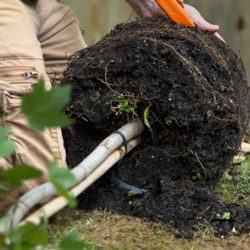
  4. Core aerate if you have compacted soil or heavy thatch. Remove the cores and dispose of them properly to keep the soil light and airy for seeding.
  5. Apply starter fertilizer and lime if determined to be needed by the pH test, or choose a grass type that will thrive in your soil’s conditions.
  6. Dethatch your lawn if thatch is thicker than ½ inch. This can be done with heavy raking or a special dethatching rake may be necessary in extreme cases.
  7. Overseed with the proper seed. If core aerating, lightly topdress with topsoil or humus.
  8. If needed, cover the freshly seeded area with netting or hay to discourage birds or other wildlife from consuming the seed before it grows.
  9. Water daily until grass has germinated, then soak once a week to encourage deep root growth.
  10. Fertilize in late fall with fall fertilizer.

Seeding A New Lawn

If you have no existing lawn or the entire ground is overrun with nothing but weeds, it may be best to start from scratch and create the lawn of your dreams.

  1. Kill existing vegetation with nonselective herbicide. If you want to preserve nearby trees or shrubs, take steps to protect that vegetation from the treatment.
  2. Take a soil sample of your lawn to determine the pH. A testing kit can provide a good pH estimate, or a gardening center or garden extension service can provide a more precise evaluation.
  3. Prepare soil by breaking up the surface with a rake or spade using a crisscross pattern. All large lumps should be broken up, and any large rocks should be removed.
  4. Broadcast starter fertilizer, lime and gypsum as determined by the pH test. This will provide a nutrition boost for fresh seeds.
  5. Spread topsoil or humus to a ½ inch depth for appropriate planting.
  6. Rototill to a depth of 4 inches and grade smooth. This will mix all the top layers together for uniform soil and nutrition, ensuring even turf growth.
  7. Sow proper seed and mulch lightly with salt hay to control erosion and conserve moisture.
  8. Water daily until grass has germinated, then soak once a week to encourage deeper root growth to resist droughts and repel weeds.
  9. Fertilize in late fall with fall fertilizer to provide nutrition throughout the season.

Which Seed?

Not every lawn will thrive with the same type of grass seed. Allow our staff to help you select the seed that best suits your needs, soil type and planting conditions. Apply at the recommended rate and incorporate into the top ¼” of soil. Do not bury the seed or it may not germinate evenly.

No matter what the condition of your lawn, fall is the best time to take steps to help it rejuvenate so you have an amazing lawn to enjoy in spring.

FallLawn_2

FallLawn_1

Kale, the Super Food

Did you know kale is a super food? Kale belongs to the same family as cabbage, broccoli and Brussels sprouts. It is a rich source of vitamins C, A, & B6, and is loaded with manganese, calcium, copper and potassium, with no fat or cholesterol. Add it to your garden for a healthy harvest!

Planting

In the fall, set out transplants or sow kale seeds about 6-8 weeks before first frost in deep rich soil. Kale will need at least 6 hours of sun per day. Enrich your planting soil with plenty of compost. Planting kale in nutritious soil will promote faster plant growth and thus provide a tender, richer crop. Soil pH should be between 6.5 and 6.8. Sow seeds roughly one-half inch deep and thin seedlings to 8-12 inches apart to provide adequate air circulation. When thinning kale shoots, however, bear in mind that larger spacing will produce larger plants, larger plants produce larger leaves and larger leaves are generally tougher. Keep soil moist and mulch to control weeds. Water when planting and during dry spells.

Harvesting

Don’t worry about frost harming your harvest, a light frost will only enhance the sweetness of kale. Harvest the outer leaves of kale as they are needed for salads and recipes. Young tender leaves will grow from the center of the plant. Use the young leaves for salads and keep older leaves for cooking, which will help tenderize those larger leaves. Kale will continue to produce throughout fall in the warmer sections of our area. In low lying areas or where it is colder, use floating row covers or low tunnels to extend the life of your kale. Kale will bolt (elongate) and flower in the spring. This signifies the end, and it is time to pull it up and compost the remaining plant.

Cooking

Kale may be used fresh or frozen. It may be steamed or stir-fried, or used in soups, stews, omelets and casseroles. It is a tasty base for salads or can be added to sandwiches. It may be used in recipes as a replacement for spinach and collard greens. It even makes fantastic chips!

Kale Chips

  • Preheat oven to 425 degrees Fahrenheit.
  • Clean Kale and spin dry. Remove all the tough stems.
  • Drizzle about 8 cups of leaves with one tablespoon of olive oil and toss to coat.
  • Place Kale leaves in a single layer on a parchment lined cookie sheet.
  • Bake for 10-15 minutes or until leaves are crisp but not scorched.
  • Remove from oven and immediately sprinkle with generous amount of flaky sea salt.
  • Devour!

With so many tasty options for kale and so many nutritional benefits from this super food, there’s no excuse not to add this easy-to-grow dietary wonder to your garden!

kale_close_250x250

kale_250x250

Winter Pond Prep Checklist

Your pond can be an attractive and valuable focal point of your landscaping, but it can also be a delicate one. As winter approaches, certain steps should be taken to ensure plant and fish survival so your pond will still be at its best next spring.

  1. Clean Out Debris
    Use a netted scooper, a rake, your hands and, if possible, a pond vacuum to clean out pond debris. Rotting vegetation produces gas under winter ice that can be fatal to fish, frogs or other aquatic wildlife. This is also a good time to reduce any mud coverage over the pond’s bottom.
  2. Trim Pond Plants
    Trim and move hardy pond plants to the deep end of the pond (minimum 18” depth) to prevent them from freezing. Cut their vegetative growth back to about one inch above the soil line. Extra foliage will be more delicate and could rot over the winter. Especially be sure to trim any foliage that is already broken, wilting or damaged.
  3. Remove Tropical Plants
    Tropical plants or any delicate vegetation should be removed from the pond and placed in a basement or garage where they will not freeze. Keep plants moist throughout the fall and winter months until it is time to return them to the pond.
  4. Disassemble Summer Equipment
    Remove and clean the pond pump and waterfall or fountain feature (if applicable). Store them inside for the winter. See your maintenance guidelines for proper storage recommendations to keep the equipment in peak condition.
  5. Clean Pond Filter
    Thoroughly clean the pond filter and inspect it for any damage. If necessary, repair or replace the filter.
  6. Change Fish Diet
    Feed fish with spring/autumn food mixtures to provide good nutrition for their slowing metabolism. Stop feeding them completely when temperatures drop consistently below 50 degrees Fahrenheit. Avoid overfeeding, which would contribute to excess debris and decay in the pond over the winter.
  7. Set Up Pond Heater
    If needed, set up your pond heater for winter use. Test the equipment to be sure it is functioning properly and make any repairs or adjustments as needed.
  8. Cover the Pond
    Cover your pond with netting, screening or a shade cloth to minimize debris that will fall into the water throughout the winter. Secure the perimeter with sod staples or rocks to prevent the covering from blowing away. This will make spring cleanup and restarting your pond much easier.
  9. Relax until spring!
    Your pond will be ready for warmer temperatures when you are.

pond_250x250_2
pond_250x250_1

Stuff a Gardener’s Stocking

Stocking stuffers don’t have to be useless, jokey items that are quickly forgotten after the holidays. Instead, choose the appropriate stocking stuffers with a gardening twist, and even the smallest stocking will be filled with gardening fun for that special gardener in your life. No matter what type of gardener you want to buy for, we’ve got the right stocking stuffers for their green thumb!

All gardeners love:

  • Weather stations, rain gauges and hygrometers
  • Window thermometers or barometers
  • Hand tools such as bulb diggers, trowels, pruners, foldable saws and cultivators
  • Whetstone for sharpening blades
  • A soil pH reader
  • Velcro support tape
  • Holsters for pruners
  • Hand lotion to prevent chapping
  • Watering cans or wands
  • Kneeling pads
  • Subscriptions to their favorite gardening magazines
  • Garden-themed ornaments or trinkets

Seed sowers appreciate:

  • Seed packets, especially heirloom or unique varieties
  • Seed balls, pellets or garden “bon bons”
  • Soil thermometers
  • Dibble stick
  • Warming mats (just roll them up to put into the stocking)
  • Plant labels including metal with an embossing pen or write on styles
  • Small envelopes for storing seeds

Fashionista gardeners can feel glamorous with:

  • Stylish sun hats and sunglasses
  • Gardening aprons or belts
  • Garden clogs
  • Garden-themed jewelry
  • Gloves in chic colors or patterns

Flowerbed aficionados will appreciate:

  • Bulbs for spring blooms
  • A wildflower guide
  • Floral-themed garden accessories
  • Delicate bud vases for bringing flowers indoors
  • Spray bottle for pesticide or fungus care

Quirky gardeners will enjoy:

  • Whimsical wind chimes
  • Fairy garden accessories
  • Crazy types of plants and new cultivar seeds
  • Kitschy décor, like plastic pink flamingos
  • Garden gnomes and accessories
  • Themed stepping stones or create-your-own kits

Urban homesteaders can always use:

  • How-to guides for canning and preserving food
  • Filters for a kitchen compost bucket
  • Treats and toys for chickens, goats or other livestock
  • Indoor herb garden accessories
  • Microgreen kits

Wildlife-friendly gardeners will appreciate:

  • Bird feeders
  • Bird foods such as suet cakes or hummingbird nectar
  • A squirrel corn cob feeder
  • Local wildlife identification guides
  • Critter-resistant seeds and bulbs

No matter what type of gardener is on your shopping list this holiday season, there are plenty of stocking stuffer options to meet their gardening style. Stop in and finish off that shopping list today!

stockings

Outdoor Ornamentation

Do you miss the vibrancy of your flowerbeds and the rich, lush colors of your landscape once winter sets in? With warm weather pots, window boxes and hanging baskets already in place, decorating the outside of your house this winter will be a cinch!

  1. Use only containers that are winter safe. Porous pots, like terra cotta, are not a good choice as they tend to crack when they freeze. Better choices include cast iron or aluminum urns, fiberglass or foam containers and cocoa-lined wire hanging baskets and troughs. For a truly holiday look, consider containers that may have red-and-green coloration or other holiday hues, or look for whimsical holiday-themed designs.
  2. Use the soil that is already in your containers. Remove just the tops from your previous plantings, allowing their roots to remain in the soil as an anchor for your winter arrangement. OASIS Floral foam is another good choice that works well for smaller outdoor arrangements like those in hanging baskets. You may also need some plant or gardening pins to help keep your arrangement in place and secure.
  3. Begin by adding greens to your container (note: your greens will last longer if soaked in Wilt-Pruf for 24 hours before using). Cut branches to the desired length and remove all green needles from the portion that will be inserted into the soil. Create a dense base for your arrangement using either white pine or spruce. Consider allowing some boughs to trail over the edge of the arrangement for more visual interest, or mix up different types of greens for interesting texture.
  4. Create a focal point for your arrangement with the addition of a few tall branches of curly willow, Harry Lauder’s Walking Stick, red twig dogwood or white painted birch. Position these taller elements near the back of the arrangement to allow more room for additional plants and decorative items. To add more magic to the arrangement, consider painting taller branches gold or silver.
  5. To include additional color and texture, incorporate more winter-themed plants into the arrangement. Magnolia leaves, holly, incense cedar, winterberry, China berry, pepper berry, protea, eucalyptus or other decorative branches and berries are all top choices. Go for a lush, tiered look for the best effect.
  6. To bring your arrangement to life add mini white or colored lights, desired ornaments and weather-proof ribbon. For a more whimsical look, consider garlands, candy canes, cranberry strings or even a fairy gingerbread house. Remove these when the holiday season ends and leave the arrangement intact until time for spring planting.
  7. You might spruce up around the pot to bring even more notice to your arrangement. Consider a ribbon around the pot, or add light-up gift boxes or wrapped boxes around the pot to create a larger focus.

With just a few steps, the outdoor containers you enjoy in spring, summer and fall can continue to be lovely accents for holiday and winter decoration.

Pine branch garland adorning black wrough iron fence in boston

outdoor-3

Autumn: Why Plant Now?

Although many gardeners plant trees and shrubs in the spring, knowledgeable gardeners plant in the fall to take advantage of all this fabulous season has to offer. But why is fall planting better than spring planting?

  • Stress Reduction
    Transplanting causes stress as plants are removed from containers, balls or established locations and changed to new locations. Planting in the fall, when a plant is entering dormancy and is generally hardier and sturdier, reduces this stress so the plant can thrive.
  • Establishing Strong Roots
    Fall planting “establishes” trees and shrubs by encouraging root growth. Because the soil is still warm, the roots continue to develop until freezing, though the upper parts of the plant are already dormant. When transplanting in the spring, the developed roots are active and delicate tips or rootlets, as well as buds and new leaves, are more easily damaged.
  • Weather Resiliency
    Trees and shrubs planted in the fall are better able to withstand the rigors of the next summer’s heat and dry conditions because they have much longer to develop healthy roots systems and become thoroughly established. This is especially critical in dry climates or areas prone to drought or irregular rainfall.
  • Faster Maturity
    The “head-start” of fall planting results in a larger plant in less time, helping create a mature landscape without waiting for smaller plants to catch up. This can be especially critical when replacing dead or damaged plants in a mature landscape to avoid a gap or uneven look.
  • Water Conservation
    Planting in the fall saves watering time and promotes conservation by eliminating daily watering. Cooler temperatures with the addition of both morning and evening dew contribute greatly to soil moisture availability in fall without as much supplemental watering.
  • Color Confirmation
    Fall is the best time to see a plant’s autumnal color. Planting in the fall eliminates the surprise of the wrong color or unexpected shades that may not coordinate with nearby plants. By planting in autumn, you’ll know exactly what you’re purchasing and planting, and you will be able to match better with your existing landscape.
  • Saving Money
    Last but definitely not least, buying your beautiful trees and shrubs in autumn can save big money. We discount prices on trees and shrubs to create room for holiday season materials and pass the savings on to you. Selection may be more limited later in fall, however, so don’t wait too long to take advantage of great savings.

Autumn can be the ideal time to plant trees and shrubs, whether you are adding to your landscape, replacing plants or starting a whole new look. If you plant in autumn, you’ll be amazed at how lovely your landscape will look next spring.

AutumnWhyPlant_2

AutumnWhyPlant_3

Making a Terrarium

Hold onto your gardening hats, folks! Remember terrariums? A new trend revitalizing this old style is now better than ever. Creating a theme for your terrarium is easier too, with the all the miniatures now available. Remember those skinny-necked bottles and what a hassle they were? New container styles make terrariums easier to plant, simple to maintain and more beautiful in your home.

Style

What is your terrarium’s style? Tropical with ferns, arid with cacti or beach-like with tiny grasses, sand and water-like pebbles? Will you have figures such as fairies or gnomes? To choose the plants, consider the lighting where you plan to place the terrarium. If your gnome home is to be in the corner, consider using a cute fluorescent light or similar illumination to help keep your terrarium’s plants healthy and thriving.

Container Shape and Size

Choose your container and ensure it has enough room for your completed dream. Clear glass allows views of different layers of sand, soil and top dressing, giving your terrarium extra depth. Container shapes include hanging, footed, cylindrical, spherical, even leaning. Multi-sided geometric shapes are popular, as are smooth, curved shapes with a natural flow. If your garden includes tropical plants, consider a container with a smaller opening or a lid to increase humidity for healthier plants.

Don’t forget to consider size – tiny terrariums with just a plant or two are popular and can be hung like ornaments or make great gifts, while larger containers can create an entire microcosm and unique environment for a stunning display.

How to Plant

Planting a terrarium takes a little extra care, but is no more difficult than planting any houseplant.

  1. Put an inch or two of small gravel, pebbles or expanded clay pellets into the container, providing a drainage base. Mixing in several tablespoons of horticultural charcoal prevents odors. If the container is large enough, layer other colors or sizes of pebbles or sands to create visual interest when viewed from the side.
  2. Soil goes in next. Many plants grow well in light soils mixed with peat moss and vermiculite or perlite. Moistened coir is another option. Alternatively, consider special prepared soil mixes for African violets, succulents or cacti.
  3. Create a landscape plan by first arranging the plants on the tabletop to determine where they will be placed in the container, taking into account how the plants may touch the sides or top of the container.
  4. Plant the largest plant first. Dig a small hole, place the plant, and firmly tamp the soil around it. This is very important to stabilize the plants and remove air pockets. If the space is tight, smaller plants may be able to help stabilize larger plants.
  5. After placing the plants, you may want to top-dress with decorative pebbles or bark. Sand looks great around cacti. This is also the time to place fairies, cottages, twigs, larger stones, marbles and other decorative items in your terrarium to create the desired theme.
  6. When everything looks good (look at it from all sides and angles), use a small artist brush to clean any loose dirt or sand away from the sides and leaves.
  7. Use a mister to water the plants. Because the container acts as a small biosphere and much of the moisture is recycled, a little water lasts for quite awhile. Do not overwater your terrarium or the plants may rot, and replacing them can be a challenge.

Place your terrarium in its new location and enjoy its beauty and your accomplishment!

Preserving the Harvest

Was it a bumper crop this year? Do you have tasty fruits, vegetables and herbs overflowing your storage? Now that the harvest is in, the decision needs to be made as to what to do with the abundance.

Years ago, homes had root cellars to store winter squash and root vegetables such as onions, potatoes and carrots to keep them cool and dry for several weeks. As more homes refinish basements into living spaces and more urban gardeners expand their harvest, however, it may be difficult for gardeners to store their harvest this way. So, what can they do?

Here’s a quick little table to help:

Vegetable Store Freeze/Blanching Time Can Dry Pickle
Beets X (2 min) X X X
Broccoli (3 min) X X X
Brussels sprouts (3 min) X X X
Cabbage (90 sec for wedges) Pickle first X X
Carrots X (5 min) X X X
Cauliflower (3 min) X X X
Celery (3 min) X X
Fennel (1/2 min) Pickle first X
Horseradish X (shred) Prepare as sauce X X
Kohlrabi (3 min) Pickle first X X
Onions X (raw) Pickle first X X
Parsnips X (2 min) X X X
Potatoes X (cooked) X X X
Rutabagas X (2 min) X X X
Sweet Potatoes/Yams X (cooked) X X X
Turnip X (2 min) X X X
Winter Squash X (cooked) X X X
  • Storing: Only store mature and perfect vegetables. If there are soft spots or bruises, eat immediately or preserve. Leave several inches of stems on winter squash. It’s important to maintain temperatures between 32-40⁰ Fahrenheit with good air circulation and ventilation. To reduce spoilage, the humidity should be between 85-95 percent.
  • Freezing: Freezing maintains nutrients, flavor and texture. Most vegetables require blanching (cutting into pieces, a boiling water bath [see times above], followed by immersion into very cold water) prior to putting into freezer bags or containers in the freezer. Maintain a temperature of 0⁰ Most vegetables will store well in the freezer for up to 12 weeks.
  • Canning: Best method for vegetables with high water content such as fruits and tomatoes. Hot water baths or pressure cookers seal the contents in sterilized jars. Most vegetables are low acid foods and require using a pressure cooker. Use cleaned, fresh and tender vegetables. Follow all pressure cooker instructions carefully.
  • Drying: No special equipment required. Most people use ovens or dehydrators. It’s important to have good air circulation and all vegetables are cleaned and not bruised. Blanching in a hot water bath increases quality and cleanliness. Adding 1/4 teaspoon of citric acid to each quart of water will reduce darkening and discoloration.
  • Pickling: Used around the world to preserve foods, pickling also includes relishes and fermentation. Examples include Kim-chi, pickles, sauerkraut and chutneys. Follow all recipes carefully. Most use vinegar to stabilize acidity and prevent bacteria. Some recipes will suggest canning to preserve the product, others will recommend refrigerator or crock storage.

Have specific questions? The National Center for Home Food Preservation has many online publications to assist you.

Herbal Delights

No matter how cold the temperatures or how deep the snow, you can enjoy the pleasures of herbs this winter season by growing them in your windowsill. Herbs are great for adding zest to any food and are a delicious substitute for salt and artificial flavors. They can also make dinner a visual delight! Add herbs to breads, soups and stews for flavor or use as a lovely garnish. Here are some great selections to try…

Rosemary is a must for the cook. Fresh rosemary is much richer and more fragrant than dried sprigs. Its needle-like foliage has a piney or resinous aroma and flavor. Rosemary is good with any meat or poultry, with stronger tasting fish, and with pizza, breads and potatoes. It is companionable with garlic and citrus flavors. A pleasing apple jelly can be scented with rosemary for a gourmet touch.

Chives, being a member of the onion family, is one of the few flavoring plants that appreciates some fertilizer. The hollow spears should be cut as needed by clipping a few spears just above the ground. It is used mostly as a garnish or final ingredient wherever a light onion taste is wanted, and it won’t overpower your recipes.

Mints are a necessity for herb windowsill gardens. No one would want to be without spearmint and peppermint, and maybe orange mint, for fresh teas and additions to fruit cups and ice cream. Fragrant and luscious, mints also make delightful garnishes for drinks or can be frozen into ice cubes.

Sage is a standby for poultry, breads and stuffings and combines well with corn or apples. Fried leaves are good to nibble. Experiment with different types of sage to enjoy their subtle variations and different flavors.

Thyme, a huge family of small upright, mounding or creeping plants, comes in a variety of flavors. You will find varieties labeled French, English, Common and Lemon, with leaves that may be all green or silver-edged or even variegated with gold. Every herb garden should have some thyme, and it pairs will with lamb as well as in marinades and salads.

Oregano is the hardier cousin of marjoram. It is a familiar flavoring in Italian and Greek cooking, in meats, sauces and of course in pizza. Oregano can be added to salads, used in marinades or mixed in with breads for rich flavor without any butter needed.

When growing your herbs, be mindful of their sunlight needs and keep them away from heating vents that can dry the soil out too quickly. Use organic fertilizers like fish emulsion and seaweed sparingly. Although fertilizers make the plants beautiful to look at, the less fertilizer used on an herb, the better it will taste. Now is a great time to start growing or to add to your culinary herb collection. Winter is the perfect time to start adding zest and flavor to your cooking!

herbal-delights-1